
The Complete International Travel Checklist: Everything to Do Before You Go
Order your international travel checklist by lead time: check documents and entry conditions first, start anything that needs an application or appointment, then organize money, connectivity, bookings, and backups. Leave the final 72 hours for confirmation rather than discovering a missing requirement.
This guide is for international vacations lasting a few days to a few weeks. It does not assume a particular passport or destination. Its five stages, eight preparation tracks, and Stopper / Deadline / Comfort categories are planning tools; official authorities and your providers determine the requirements that apply to you.
Start with four priority checks that can stop your trip
Before adding smaller tasks, check:
- Your passport: Is it acceptable for the entire route, including its validity, issue date, condition, and blank pages?
- Your entry permission: What does each traveler’s citizenship and status require for the destination and transit countries?
- Your medication: Can you legally bring each medicine, in the planned quantity, with the required documents or permission?
- Your booking identity: Were tickets issued using the travel document and name details the carrier requires?
These are starting points, not an exhaustive list of possible barriers. Required vaccination evidence, supporting entry documents, restrictions affecting your status, and other conditions can also matter. Resolve any requirement that could prevent travel before committing more nonrefundable money.
For a couple, family, or group, repeat the document checks for every traveler. Sharing an itinerary does not mean sharing the same entry conditions. Keep unresolved questions visible until the relevant authority has answered them.

Cover photo: Charlotte Noelle / Unsplash.
The checklist at a glance
The five preparation stages
The windows below are suggested planning checkpoints, not official deadlines. Start sooner whenever the actual application, appointment, or treatment schedule requires it. Move an authorization into an earlier stage if its published process or your circumstances need more time.
| Stage | Suggested checkpoint | Main tasks | Why start here? |
|---|---|---|---|
| 1 — Decide | As soon as the trip is considered | Documents, destination and transit rules, health needs, trip shape | Find barriers before major commitments |
| 2 — Long lead | Ideally 2–3 months ahead, or earlier | Renewal, visas, clinician, medication permissions, insurance decision | Processes may need appointments and extra documents |
| 3 — Core prep | Around 4–6 weeks ahead | Outstanding authorizations, prescriptions, payments, connectivity, bookings | Leave room to correct failures |
| 4 — Confirm | Around 1–2 weeks ahead | Booking audit, copies, contacts, customs, home arrangements | Verify details while fixes are still possible |
| 5 — Final | Last 72 hours | Current guidance, downloads, transport, devices, handover | Confirm earlier work and respond to changes |
The eight preparation tracks
Stages answer when; tracks answer what might be missing. Review every track at the start and again during confirmation. An empty track means either a gap or a deliberate decision that nothing applies.
| Track | Core question | Typical tasks | Where to verify |
|---|---|---|---|
| 1. Documents | Is my travel document usable? | Validity, pages, issue date, renewal | Passport authority and destination authorities |
| 2. Entry | Can I make this route? | Visa, authorization, transit, supporting evidence | Official immigration and consular sources |
| 3. Health | What needs advance preparation? | Clinician, vaccination evidence, medication permission | Health authorities, clinician, destination authorities |
| 4. Money | Can I pay if one method fails? | Cards, cash access, backup funds | Banks and payment providers |
| 5. Connectivity | Can I communicate and access accounts? | Data plan, offline files, authentication | Phone and account providers |
| 6. Bookings | Do the reservations fit together? | Identity, dates, arrival, cancellation deadlines | Carriers and accommodation providers |
| 7. Home and life | What needs handling while away? | Bills, pets, deliveries, work | Your obligations and trusted contacts |
| 8. Backups and contacts | How would I recover a lost essential? | Copies, emergency contacts, assistance details | Consular services and providers |
Turn your departure date into five deadlines
Write the departure date at the top of one task list. Start Stage 1 now, then add provisional checkpoints for long-lead work, core preparation, confirmation, and the final 72 hours. Replace these suggested dates with earlier ones when official requirements demand it.
Give each unresolved task an owner, next action, deadline, and source. For example: “Check medication permission with destination authority; send generic name and quantity; follow up next week.” Save the answer and date checked. A bookmarked page is useful, but it is not a completed application.
How to verify a requirement instead of trusting a general rule
A requirement can depend on citizenship, residence status, travel document, purpose, duration, route, and recent travel history. Someone else’s successful trip is not confirmation for yours.
Use this Verify at the Source method:
- Describe the traveler and route. Include citizenship, relevant residence status, travel dates, purpose, and every transit country.
- Find the responsible authority. Start with your government’s destination guidance and the destination’s official immigration, health, or consular information.
- Check applicability and timing. Distinguish a requirement from a recommendation, and an application from an approval.
- Record the action and evidence. Save the official link, date checked, documents needed, and approval or confirmation.
- Resolve uncertainty before departure. Ask the responsible authority about legal requirements and the carrier about boarding/document checks.
Useful starting points include U.S. travel guidance, GOV.UK destination advice, Canadian travel advisories, and Australia's Smartraveller checklist. Use the service for your citizenship; destination authorities provide the applicable entry rules.
For applications, follow links from an official government page. Branding, an advertisement, or a high search ranking does not prove a site is official. GOV.UK's ETA guidance warns that other websites may charge more and imitate government services. Check the full address before entering passport details or paying.
Stopper, deadline, or comfort?
An item can belong to more than one category. These labels set priorities; they do not describe every possible consequence.
| Item | Priority | Why it matters | Verification source |
|---|---|---|---|
| Acceptable passport and entry documents | Stopper | Travel may be refused | Destination authority and carrier |
| Required visa or authorization | Stopper + deadline | Submission alone may be insufficient | Official application portal |
| Required health evidence or medication permission | Stopper + deadline | Conditions may prevent lawful travel | Destination authority and clinician |
| Ticket/document identity issue | Stopper if unresolved | Carrier may require correction | Ticket issuer and operating carrier |
| Renewal, appointment, prescription supply | Deadline | Availability may determine whether travel works | Authority, clinician, pharmacy |
| Insurance purchase or booking cancellation | Deadline | Terms and eligibility may depend on timing | Policy and booking terms |
| Payment and account access | Deadline; potentially essential | A failure can block needed services | Your providers |
| Copies, maps, and home arrangements | Comfort or essential for your needs | Importance depends on the traveler | Consular guidance and personal arrangements |
Stage 1: As soon as the trip is decided
Inspect the passport, research destination and transit conditions, and check whether health preparation needs substantial lead time. Do this before assuming the trip is bookable. For dual nationals or travelers using residence permits, verify which documents are needed to leave, enter, transit, and return.
Set a realistic trip shape and spending ceiling alongside these checks. You only need enough detail to identify commitments and deadlines here; itinerary building and full budgeting are separate decisions. Keep flexible options open until major document questions are resolved.
If an important answer is unclear, put that task first. Do not let booking a hotel or choosing activities create the impression that entry preparation is settled.
Stage 2: Passport, entry authorization, and health
Passport: validity, pages, condition, and name matching
Validity is destination-specific. Six months is not a universal rule or a guarantee of acceptance. EU guidance for non-EU travelers, for example, sets out two checks for covered short stays: at least three months of validity after intended departure and a passport issued within the ten years before entry. Confirm the exact rule for your route and status rather than substituting a general buffer.
Check the physical document. Confirm any blank-page requirement and ask your passport authority about damage. The expiration date alone does not settle whether a document is acceptable.
Review ticket identity early. Compare names and document details with the carrier’s instructions. Ask the issuer about differences, including married names or transliteration. Do not assume every formatting difference needs a paid change, or that a genuine identity mismatch will be accepted.
Check total renewal time. As checked September 30, 2026, U.S. passport processing is listed at 4–6 weeks routinely or 2–3 weeks expedited, excluding mailing. The authority says mailing can add up to two weeks in each direction. These are U.S. estimates, not guarantees or worldwide timelines.
Review children’s documents separately. Children may need additional consent or custody evidence depending on the route and who accompanies them. The U.S. checklist flags this even when one parent travels. Check the destination’s requirements well before departure.
Entry requirements and travel authorizations
A visa, electronic travel authorization, arrival form, and border registration are different processes. Identify which apply to each traveler. Check your actual connection: remaining airside, collecting baggage, changing airports, or crossing border control can produce different requirements.
Apply through official channels within the permitted application window. Allow time for additional information or a decision; do not build the schedule around the fastest advertised approval. Verify the approval’s passport details, permitted dates, conditions, and validity before marking the task complete.
Keep required supporting evidence accessible, such as onward travel or accommodation details when applicable. Permission to travel is not necessarily permission to enter: the UK's official ETA page expressly says an ETA does not guarantee entry.
ETIAS status, checked September 30, 2026: the European Commission states that ETIAS is not operating and applications are not being collected. Do not pay a site claiming to obtain an ETIAS approval now. Recheck the official EU information for your future travel date; when the system opens, follow its official website or app instructions.
What happens at the European border now
The European Commission's EES guidance confirms full operation from April 10, 2026. It records covered non-EU travelers’ short-stay entries and exits at participating countries’ external borders, using travel-document and biometric information, and replaces passport stamping for those covered.
EES and ETIAS are separate. Do not treat EES as an advance visa application. Check the official traveler guidance for applicability, exemptions, and available border procedures, and allow reasonable time for the crossing. Registration does not replace any visa or supporting evidence your trip requires.
Health preparation and timing
Arrange a clinician appointment while there is time to act. CDC's current pre-travel guidance recommends an appointment at least 4–6 weeks before leaving; Smartraveller suggests a basic check at least eight weeks ahead. These are planning recommendations, not competing entry rules.
Discuss the complete itinerary, activities, duration, health conditions, and vaccination history. Separately check any mandatory health evidence with destination authorities. Ask what documents are needed and when a required certificate becomes valid. If departure is close, contact a clinician promptly rather than deciding that preparation is pointless.
Traveling with medication
Legal availability at home does not prove permission abroad. CDC's medication guidance advises checking destination and layover-country embassies. Ask about each medicine’s generic name, quantity, documentation, and any prior authorization.
The CDC Yellow Book explains that restrictions can affect medicines not controlled at home and that no single resource covers every destination. INCB country information can help identify requirements and contacts, but may be outdated; confirm with the responsible destination authority.
Once permission is clear, arrange:
- Supply: enough for the trip and a reasonable delay margin, within the quantity legally permitted.
- Identification: original labeled packaging and prescription copies using generic names.
- Documentation: a clinician’s letter or official certificate/permit when required.
- Travel management: instructions from your clinician about dose timing, storage, and any refrigeration needs.
Do not assume a universal 30-day allowance. Ask your prescriber about lawful alternatives if a medicine cannot be brought, and avoid changing treatment yourself. Complete permissions and refills early; these may take longer than buying the rest of your travel essentials.
Medical care abroad and insurance
Read your existing coverage and ask the insurer specifically about destination care, planned activities, payment requirements, and evacuation. The U.S. State Department's health guidance notes that the U.S. government does not pay medical bills abroad and that evacuation may need separate coverage. Do not assume domestic arrangements transfer unchanged.
Decide about additional insurance alongside booking commitments. Check purchase deadlines, eligibility, exclusions, assistance contacts, and whether cancellation, medical treatment, and evacuation are included. Save the policy and assistance number. Choosing a policy deserves its own comparison; this checklist ensures the decision is made in time.
Advertisement
World Nomads
World Nomads offers simple and flexible travel insurance. Buy at home or while traveling and claim online from anywhere in the world.
We receive a fee when you get a quote from World Nomads using this link. We do not represent World Nomads. This is not a recommendation to buy travel insurance.
Stage 3: Money, connectivity, and bookings

Payment redundancy
Prepare for a failed card or inaccessible account. Choose more than one usable payment method, preferably without the same single point of failure, and store backups separately. Check international use, fees, withdrawal limits, and whether your provider needs a travel notice.
Plan how you will obtain local currency if needed and reach the provider if a card is lost. Save assistance numbers somewhere other than the card itself. Check that an accessible reserve remains available after accommodation or rental holds. A backup that cannot be used abroad is only a second object in your wallet.
Connectivity and account access
Choose roaming, a local plan, or an eSIM based on your destination and device. Confirm compatibility, coverage, activation timing, and whether calls or texts needed for authentication remain available. A data connection alone may not receive codes sent to your home number.
Make choosing a connection and activating it separate checklist tasks. If your existing plan covers your destinations, intended use and travel dates at a cost you accept, settle the plan choice without buying another package. If a separate plan is needed, record which action starts its validity and when that validity ends. Schedule purchase, installation and any activation steps according to the provider’s instructions. Completing your preparation does not mean starting the plan clock now; keep the activation action tied to when you need the service.
Before departure
Compare a data plan for your trip
If an eSIM fits your device and travel plans, Airalo is one option to compare. Check coverage for every destination, the activation rules, and whether the package includes the calls or texts you need.
Affiliate disclosure: BoardingNotes may earn a commission if you purchase through the link below.
Compare Airalo eSIM plans for your tripTest account recovery and approved backup authentication before leaving. Download essential maps and files, then check what opens without a connection. Keep a small paper fallback for critical addresses and contacts. This section covers preparation, not a comparison of mobile providers.
Booking verification
Open every confirmation. Compare identity details, local dates and times, arrival instructions, and cancellation deadlines. Pay particular attention to overnight flights and transfers between separate tickets.
Save the accommodation address offline in a usable local format. Confirm late-arrival arrangements and transport for the hour you expect to reach the destination. Request accessibility assistance or other necessary arrangements early with the relevant provider. Record who has confirmed the request; a note in your own itinerary does not confirm service availability.
Stage 4: Documents, contacts, customs, and home
Copies and backups
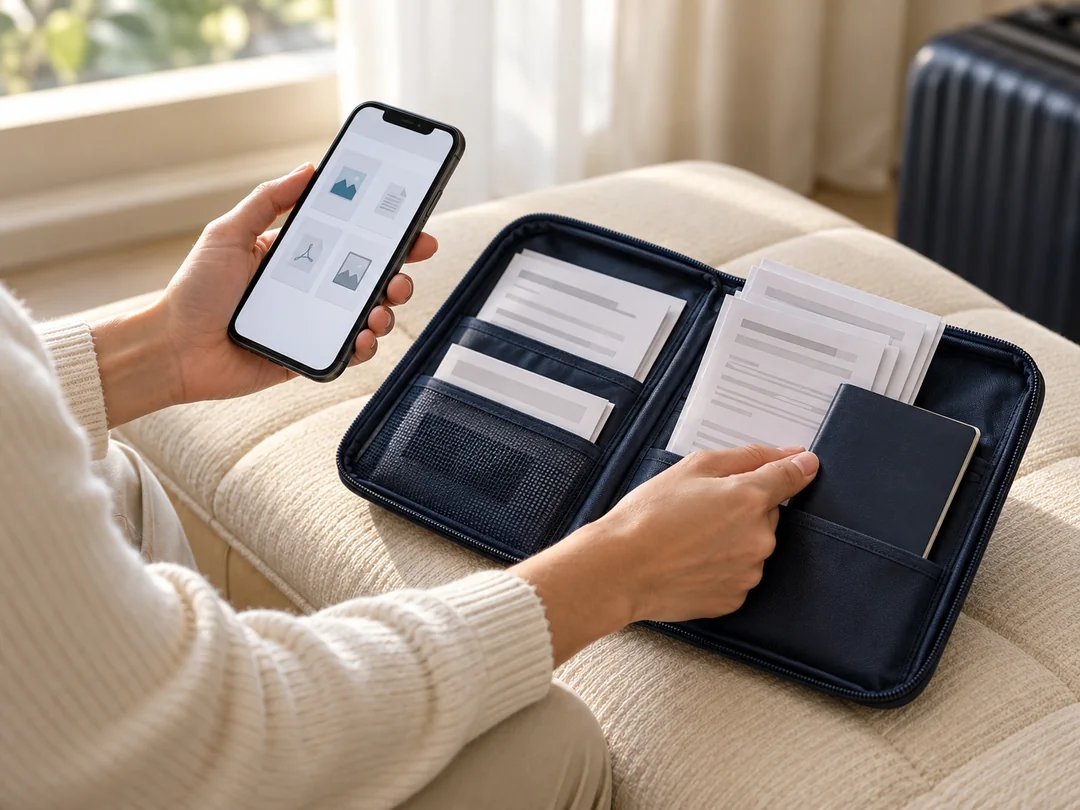
Make copies of passport details, entry approvals, insurance, prescriptions, key bookings, and emergency contacts. Smartraveller recommends carrying copies, leaving a set with someone trusted, and keeping hard copies of bookings in case the phone is lost.
Protect digital copies with appropriate device and account security. Test offline access and avoid putting every backup in the same bag as the originals. Copies help recovery; they do not ordinarily replace the travel document itself.
Emergency and consular preparation
Save the destination’s emergency numbers, your government’s consular contacts, insurer assistance, and provider support. Arrange check-ins with someone trusted and explain expected gaps in connectivity.
If your government offers traveler registration or advisory alerts, consider using them. For U.S. travelers, STEP provides embassy messages and helps officials reach you or an emergency contact. Use your own government’s service and understand its limits. A consular contact is not a substitute for accessible funds or appropriate insurance.
Customs and restrictions in both directions
Check official customs and biosecurity rules for each relevant border before packing or shopping. Look up restrictions on food, plants, animal products, medicines, purchases, and any equipment needing permission. Follow declaration instructions; declaring something does not automatically make it lawful to import.
Currency reporting is a separate task. As a U.S.-specific example, USAGov explains reporting when currency or covered monetary instruments exceed $10,000 entering or leaving the country. Read the current definitions and joint/family instructions if relevant. Other countries have their own thresholds and procedures.
Home and life admin
Arrange bills, deliveries, pets, plants, work handover, and access for someone who may need to help. Leave clear instructions and a contact method. Consider what needs attention if return travel is delayed.
Complete packing with the appropriate packing list rather than expanding this checklist into an inventory. Confirm baggage and restricted-item rules with the carrier. International pet travel, work, study, or relocation requires additional preparation beyond this vacation guide. Use the personal item packing list for in-flight essentials and the fall capsule wardrobe when planning cool-weather clothing.
Stage 5: The final 72 hours
Use this period to verify earlier work and respond to changes:
- Recheck official destination and transit information, including alerts relevant to your route.
- Check airline notifications and complete check-in when available; verify required passenger information and baggage rules.
- Confirm arrival transport, accommodation instructions, and any assistance arrangements.
- Download documents, maps, tickets, and contacts; test offline access.
- Charge devices, gather valid originals, and confirm the chosen payment backups.
- Give your trusted contact the latest itinerary and complete the home handover.
For a connecting domestic flight, check the accepted identification separately before leaving home. This guide ends at departure preparation; airport procedures and flight-day routines are covered in our airport and flight-day checklist.
Prepare now for the way home
Check re-entry requirements for your passport and residence status, including any return-leg transit. Know applicable customs allowances before shopping and keep useful receipts together. Record return check-in timing, arrange transport home, and tell your contact about a late arrival.
Put time-sensitive return tasks in the same calendar now. Do not rely on remembering them during the trip or assume the outbound requirements also cover the return.
If you're leaving sooner than these stages assume
Compress the order, not the rules. Today, resolve passport and entry questions, medication permission, and required health evidence. Contact the authority or clinician about what remains possible within your dates.
Next, review insurance eligibility, then complete payment backups, connectivity, essential bookings, and copies. Keep the home handover short but cover obligations that cannot wait. If a requirement cannot be completed, assess changing the route or dates before making further commitments. Expedited options and fast approvals are not promises.
Ten pre-departure mistakes worth avoiding
- Checking expiration without the destination’s validity or issue-date conditions.
- Assuming one traveler’s entry rules cover the whole group.
- Forgetting transit or re-entry requirements.
- Paying an imitation application site.
- Treating a submitted application as an approved one.
- Leaving health or medication permissions too late.
- Ignoring ticket identity differences until departure.
- Assuming existing medical coverage includes evacuation.
- Keeping all payment methods, copies, and account access on one phone.
- Treating checklist completion as guaranteed boarding or entry.
The complete staged checklist
Use the track numbers from the eight-track table to scan for gaps. Move tasks earlier when their real deadlines require it. “Not applicable, verified” is a valid result; “probably fine” is not.
Stage 1 — Decide
- □ Inspect passport and destination-specific conditions. [1]
- □ Confirm entry, transit, and return requirements for each traveler. [2]
- □ Identify health preparation and mandatory evidence. [3]
- □ Set trip shape and spending ceiling. [4, 6]
Stage 2 — Long lead
- □ Start renewal, visa, or other long applications as needed. [1, 2]
- □ Arrange the clinician appointment and required health documents. [3]
- □ Verify medication permission and apply for permits where required. [3]
- □ Decide insurance alongside booking commitments. [3, 4]
- □ Arrange children’s additional documents and necessary assistance. [1, 6]
Stage 3 — Core prep
- □ Complete outstanding authorizations and verify approvals. [2]
- □ Arrange lawful medication supply and documentation. [3]
- □ Prepare payment backups and access to funds. [4]
- □ Choose connectivity and test authentication/recovery. [5]
- □ Confirm bookings and cancellation deadlines. [6]
Stage 4 — Confirm
- □ Audit names, dates, arrival arrangements, and addresses. [6]
- □ Distribute protected copies and save assistance contacts. [8]
- □ Set check-ins and consider government alerts/registration. [8]
- □ Check customs, biosecurity, and currency reporting. [2, 4]
- □ Complete bills, deliveries, pets, work, and home plans. [7]
- □ Finish packing and verify carrier restrictions separately. [6]
Stage 5 — Final 72 hours
- □ Recheck official requirements, advisories, and provider updates. [2, 6]
- □ Complete available check-in and confirm arrival arrangements. [6]
- □ Test downloads and charge devices. [5]
- □ Gather originals and separate payment backups. [1, 4]
- □ Share the latest itinerary and hand over home instructions. [7, 8]
Frequently asked questions
What should you do first when you book an international trip?
Check passport acceptability and entry conditions for the complete route. Identify applications, health preparation, and medication permissions that need lead time before adding smaller tasks.
Does a passport really need six months of validity?
Not universally. Check the destination’s exact validity and issue-date rules for your status. A six-month buffer does not replace those checks.
How do you find out whether you need a visa or authorization?
Use destination authorities’ official information for your citizenship, status, purpose, and route. Include transit and return travel; follow official links to any application.
Do you need ETIAS right now?
As checked September 30, 2026, the European Commission says ETIAS is not operating and applications are not being collected. Recheck its official information before future travel.
How far in advance should you see a doctor?
Start early. CDC currently recommends 4–6 weeks; Australia’s checklist suggests eight weeks for a basic check. Your clinician can advise on the time your particular preparation needs.
Can you take prescription medication abroad?
Only within the destination and transit countries’ applicable rules. Confirm permission, quantity, and documents with the relevant authorities before arranging supply with your clinician.
Does your health insurance work in another country?
Check your own policy. Ask separately about medical care, evacuation, activities, exclusions, and upfront payments; one type of coverage does not prove another is included.
What documents should you copy, and where should you store them?
Copy key travel, entry, insurance, prescription, and booking details. Keep protected backups separate from originals and a useful set with someone trusted, including a paper fallback for essentials.
Should you register with your government before traveling?
Consider your government’s available registration or alert service. Check its purpose and eligibility; these programs are nationality-specific and do not replace emergency preparation.
Does finishing a checklist guarantee you can travel?
No. It reduces preventable preparation failures. Carriers apply boarding requirements, and border authorities decide entry under the applicable rules.
Your next action
Pick up your passport and open the official entry information for your destination and transit route. Identify the first unresolved requirement, record its real deadline, and start there. Then work through the five stages and review all eight tracks. A useful international travel checklist tells you what to do next—and gives each task enough time.
Official guidance checked September 30, 2026. Entry, health, medication, and customs requirements vary; recheck the official sources for your route before departure.


